Friday, November 1, 2024

River Assault: Scenario 2

 The German steamroller plowed on into the Russian interior.  Army Group South encircled numerous Soviet armies and appeared unstoppable.  Local Soviet forces resisted but were either crushed or bypassed as Von Rundstedt pursued his goal.  The Soviets under General Tyulenev attempted to blunt the attacks and use terrain to do so.  Rivers are hard to cross for an army. Defended rivers are very hard to cross.

While the Bug and Dniester were major river crossing operations there were also smaller crossings.  


Game Notes

The typical method of crossing rivers involved heavy artillery and air power.  This was effective but does not necessarily make for a tactically interesting game.  We decided to use stealth.   In doing so we had to come up with some additional rules.  There is always a risk that without playtesting we could end up with a lopsided or disaster of a game.  Luckily, we embrace disaster.  

The objective of the scenario is for the Germans to seize and destroy the bridge demolition equipment hidden in one of the river front houses before the Soviets could blow the bridge. They have three natural turns ( those not ending by COC dice) after the alarm sounds to do it.

The attack  starts pre-dawn in darkness. Light arrives at the end of three natural turns.

The Soviets start with only a few pairs of sentries and a Junior Leader. A Jump off Point located near the bridge is inactive until the alarm is sounded. Three additional JOPs are  located at Russian table edge also inactive   

The Germans have four jump off points at their own table edge. These will be inactive until the alarm is sounded   The Germans also have a batch of half tracks and trucks.  These start the game entering the table on the German side   They each can carry a squad or Machine Gun team and also assault rafts   

Visibility is limited to 16” but the Soviets have flares and a search light. By using a COC die the Soviets  can send up a flare and double the visibility to 36” until either the turn ends or the Germans use a COC die to extinguish the flare (it was a dud.) 

The search light acts like a flare but is directionally specific. A random die roll will aim the searchlight. A COC die will allow for a more specifically placed beam.

Flares and searchlights don’t mean automatic sighting  Whispers of “get down” and “make like a statue” might enable detection to be avoided. Vehicles and moving troops are more easily spotted and heard.

The Board 

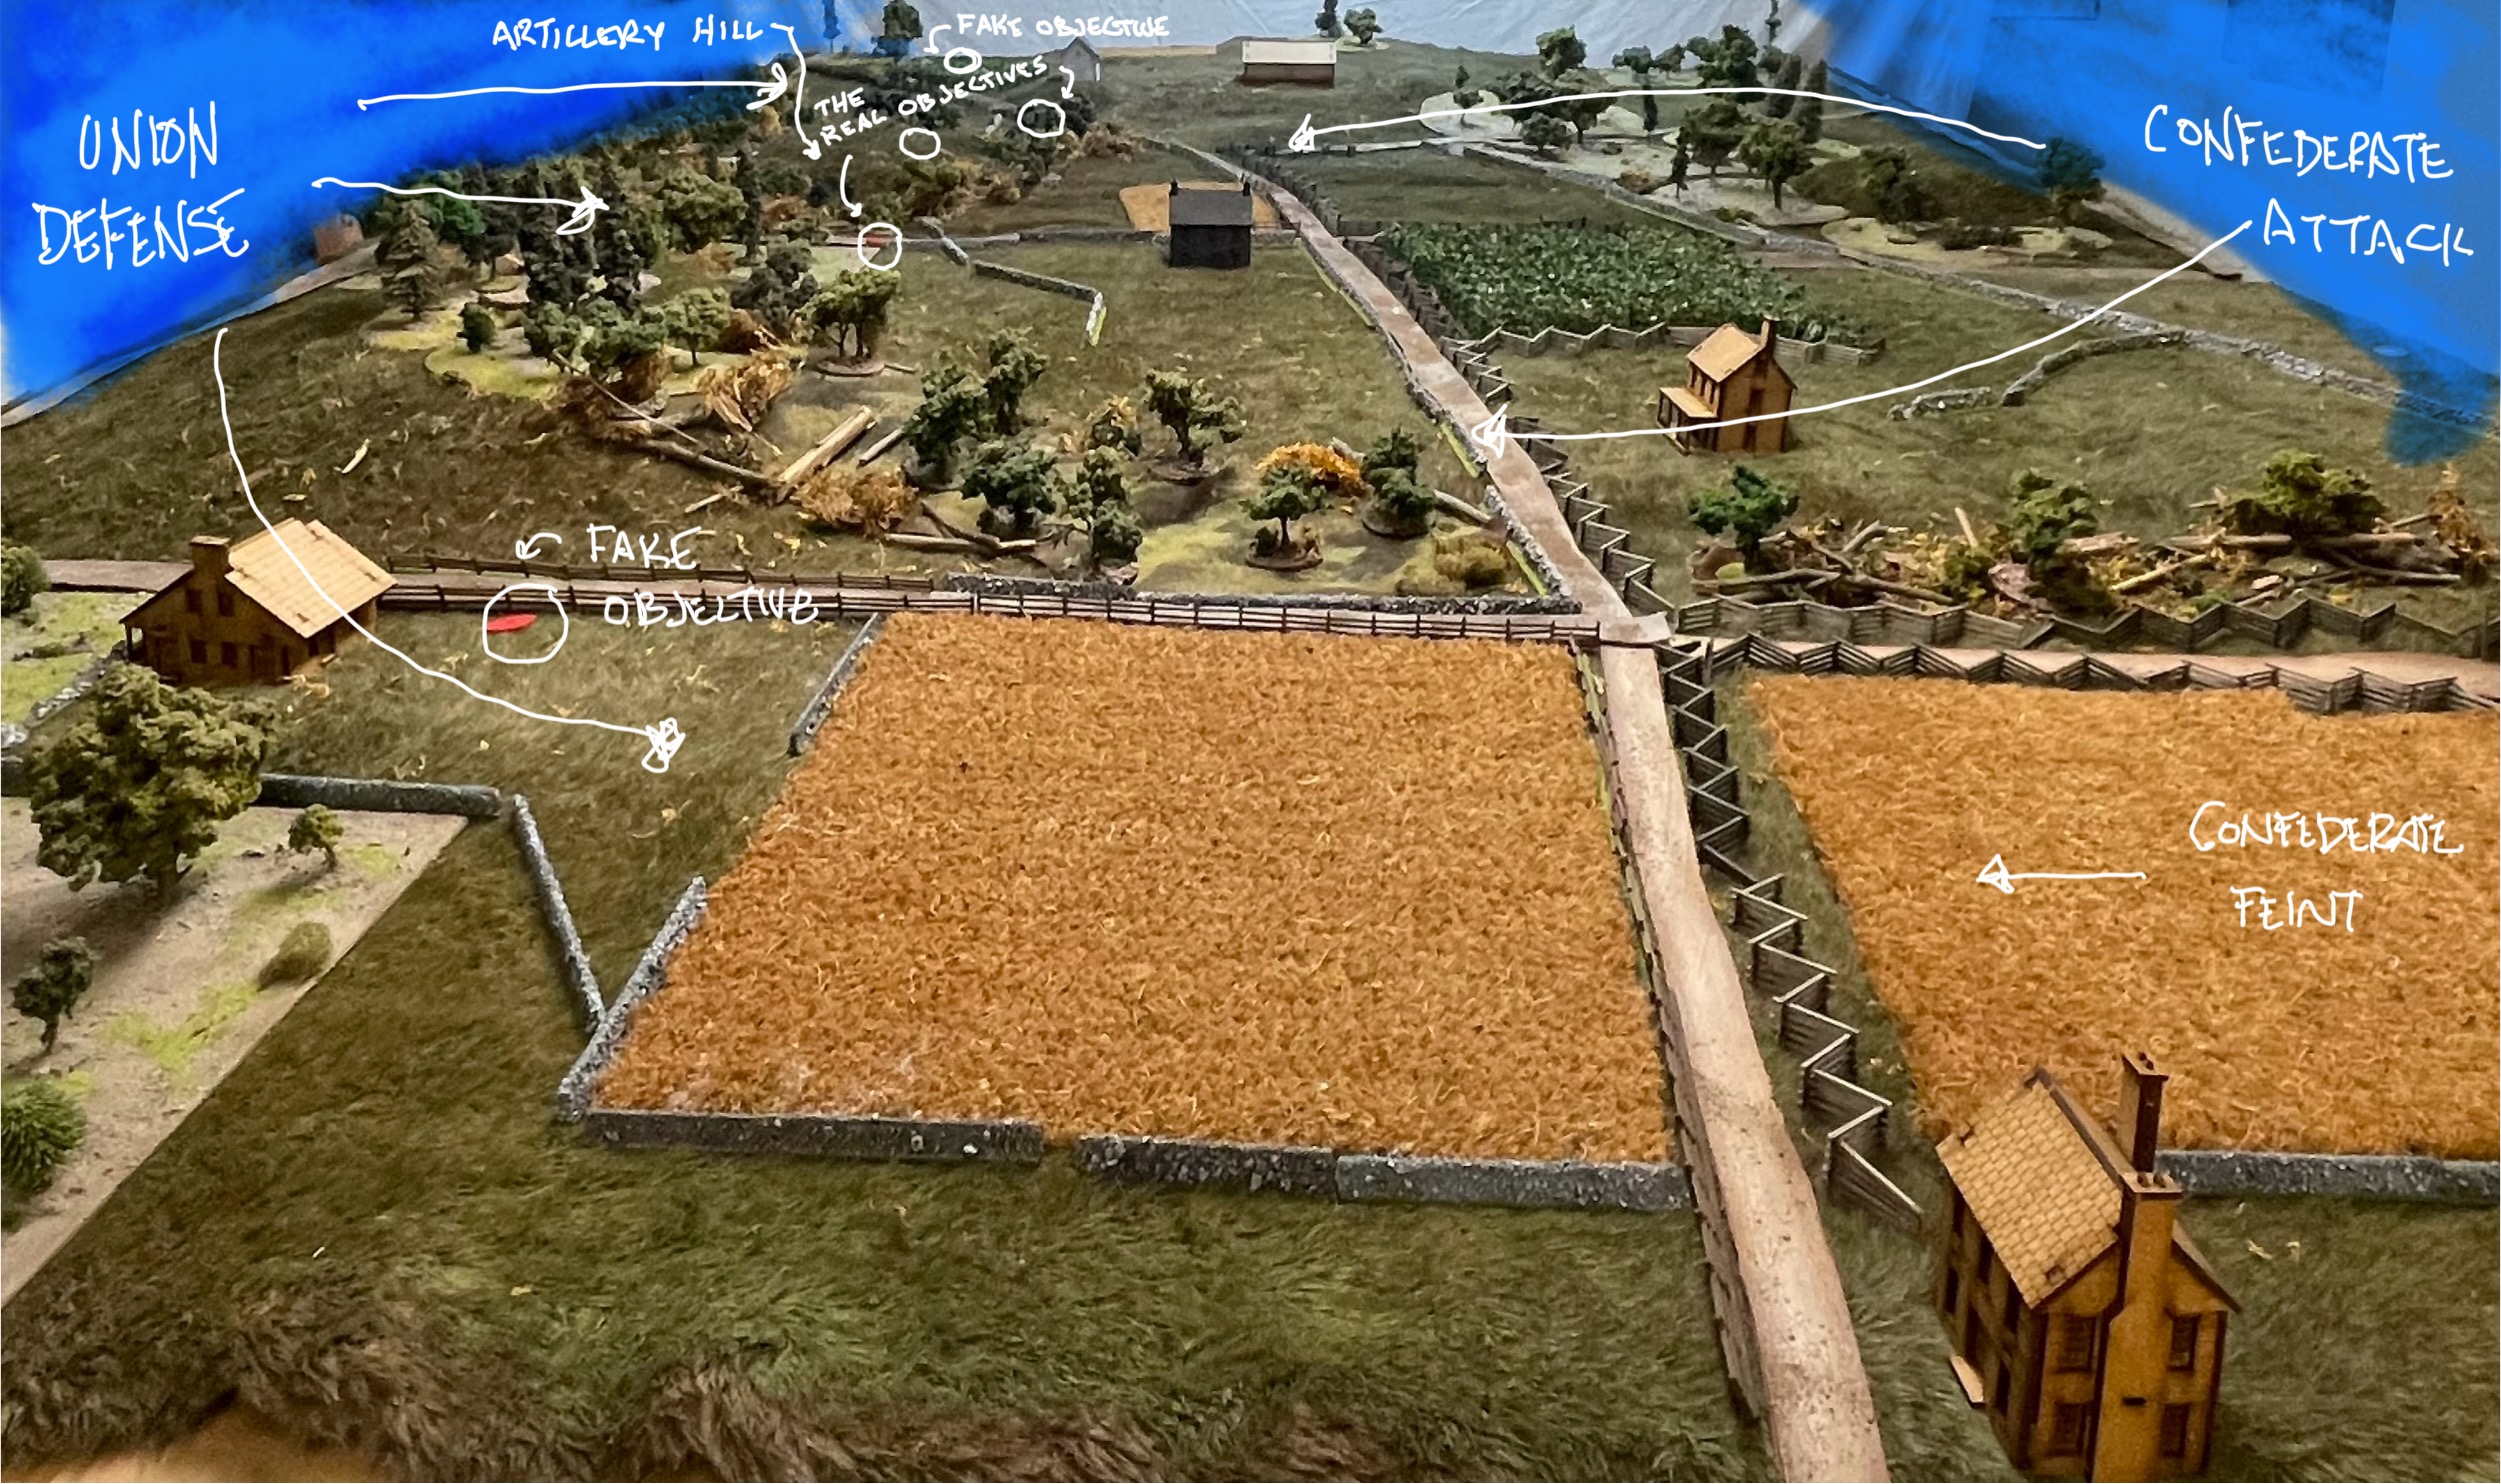
The possible objectives and Jump off points 

The Germans have several avenues and methods of attack   The woods on their right allow for protection from observation but could be slow. Additionally, it was decided that the river flowed from the German  left to right and if the boats drifted off the board they would be wrecked and the unit in the boat would have to swim back to the shore   (We used the river assault rules out of the Lardies Blitzkrieg book.)

The Germans could also go for the bridge but this is a more open route subject to being spotted.  If the Germans rush the bridge they could catch the Soviets napping (literally) but it’s likely they would be seen or heard and the alarm sounded.  

The Battle

The German (and Hungarian) attack would be stealthy   Six half tracks and three trucks crawled slowly forward, loaded with assault rafts and soldiers. (Suspend belief-these are very quiet half tracks if moving at slow speed.)

The Soviets placed their four sentries led by a Junior Leader near the bridge and Searchlight. The rest of the Russians snoozed away.

Everything is black and white at night.  Look it up.

The Axis troops spread out. Three half tracks drove for the woods while the trucks carrying the Hungarians and three other half tracks drove up the road and kept to the left.  Immediately a turn end was rolled. Two more turns and it would be light   


Everything was going smoothly for the attackers when they again rolled an end of turn.  Only one more turn until daylight.  

The Germans entered the woods to the right and quietly unloaded the rafts   Two squads of infantry and a medium machine gun crew would try to quietly slip across the river to the shelter of woods on the far side. The other six transports became tangled in a traffic jam and moved very slowly up the road and a yard to the right of the road.

Just as the rafts were about to touch water the searchlight popped to life and threw a beam of light into the woods.  The Germans froze to avoid detection but through the miracle of rolling a one, a soon to be highly decorated (possibly posthumously) sentry spotted the Germans and the alarm was sounded.


The stealthy advance was over.  The Soviets roared into action.  Infantry poured from bivouacs in the rear of the riverside village and raced for the river.

A Maxim machine gun crew that was playing cards (probably) in the village poured out of one of the houses and was quickly throwing fire at the Fritzes in the woods.


The Maxim was highly inaccurate in its firing at the lit up Germans.  Elsewhere the Axis forces dropped the stealth and rushed forward.   Even though the alarm was now sounded it was still too dark to see anything.  In an effort to keep it that way the Germans in the woods and a newly arrived pair of German tanks tried to shoot out the searchlight.  They failed…multiple times.

The Soviets were now on the move. Infantry platoons rushed towards the river and a dreaded KV-2 (and a not so dreaded BT-7) showed up.  

Note: For this campaign a high tech 21st century method was deployed. Three giant envelopes-one for each army-were filled with pieces of paper each representing one of the tanks or towed anti tank guns in the group’s collection.   Before the start of each battle players draw two slips of paper to represent available assets.  If a tank is destroyed in battle its slip of paper is removed from the envelope    The KV-2 (of which there are two) has been pulled for both battles.   So far only one of the five T-26s has been pulled. Two of three 38Ts in German service have been destroyed so far…by the KV-2.


The Soviets were waking up and pushing forward towards the river.

Note: it was at this time a discussion halted the game and numerous modifications to rules were discussed. With so many new rules there were bound to be miscalculations and this was coming to fruition.  The biggest issue was that one of the group has a nasty habit of rolling sixes in droves and ending turns.  This means that much more quickly than usual turns were ending   We could go (real life) weeks without anyone rolling three sixes and ending a turn.  In this game three turns were ended by rolls an hour into the second week of the game.  We also addressed changing searchlight rules and Jump Off Placement rules.(more on this in another post….)

And so it was that the sun rose and the Axis was way behind schedule.  The rafting Lancers were still on the near bank and the Hungarian trucks were barreling towards the bridge and the very frightening KV-2.

Who leads an assault with trucks?

The trucks were in a bind so why not hit the gas?  A rare double turn allowed the first truck in line to disgorge a squad of Hungarians who immediately rushed forward to sweep up two sentries and take cover behind a large building that was immediately to their front. The second and third truck tried to tuck in behind the first truck.

Next came the moment of the battle.  It seems there is one of these in every fight.  The KV-2 took aim and fired at the second truck in line.   A hit was scored.  A high explosive shell crashed into the truck and the Soviet tank rolled its 13 dice. Rolling two fives was bad for the truck, rolling three was lethal.   Instead every soldier who could see the event watched as a very large shell poked a clean hole through the canvas truck bed cover and exited harmlessly out the other side.  A grand total of one 5 or 6 out of 13 was rolled.

Meanwhile…paddle paddle paddle. 

That was the highlight of the attacker’s night. Hordes of Soviets poured out of the village.  Two infantry squads swept the disembarked Hungarians from the bank and rifle and machine gun fire did what the KV couldn’t.   Bullets ripped into the second  truck sending it fleeing back across the bridge with several wounded piled in the back.

The third Hungarian squad exited the last truck but was brutally dispatched by two more Soviet infantry squads who charged into them.

The fleeing Hungarian truck takes fire. 

An 88mm anti-flak gun deployed a 1/4 mile down the road(aka 10 feet down the table ) and popped the KV wounding the commander.(This is the second KV commander wounded in the first two battles.) The Germans afloat were able to reach the far bank but it was obvious that it was to little avail. 

A few Germans

A few more Soviets and a building containing a detonator 

It was clear that the Germans would not complete the mission.  Ironically, the big building next to the bridge, behind which the Hungarians briefly hid held the detonator for the bridge.

Conclusion

Several factors doomed rhe Axis effort and led to Soviet victory.  The eagle eyed Soviet who spotted the Germans on the first try and sounded the alarm forced the stealth mission to become a rush.   Then immediately morning  came exposing the Hungarians on the bridge to a massacre.  The very speed of the trucks caused them to be in front.  A bad tactical situation.  Finally, Soviet reinforcements were closer at hand and they were able to overwhelm the attackers with swarming assaults that smashed the ranks of Hungarians who were the tip of the spear.

On to the next fight as the Axis continues to push east…just not here at this river.


Friday, October 18, 2024

Wotan

July 1941.  Inside the Russian border.  The German and Hungarian forces launch attacks on a wide front, encircling large Soviet armies.  The Germans also focus on transportation hubs.   Even with the difference in track gauge that would plague Axis rail transportation throughout Operation Barbarossa, disrupting Soviet rail traffic was a focus of the attack. 

Near a small railway station outside a town so small it doesn’t even appear on a map, the German thrust has struck a Soviet force.  This is a meeting engagement and the first of five fights in the campaign.  

A Hungarian horde swarms the railroad station

 German forces approached what passes as a major road in this part of southwest Russia.  They launch an immediate attack which catches the Soviets off guard and allows the German and Hungarian troops to take control of the rail station as well as a two story house and a stone wall that runs beside the road.  The Soviets rally and meet the Germans. One Soviet platoon attempts to overlap the German left flank by pushing through some woods.

The enemies meet at the road. 


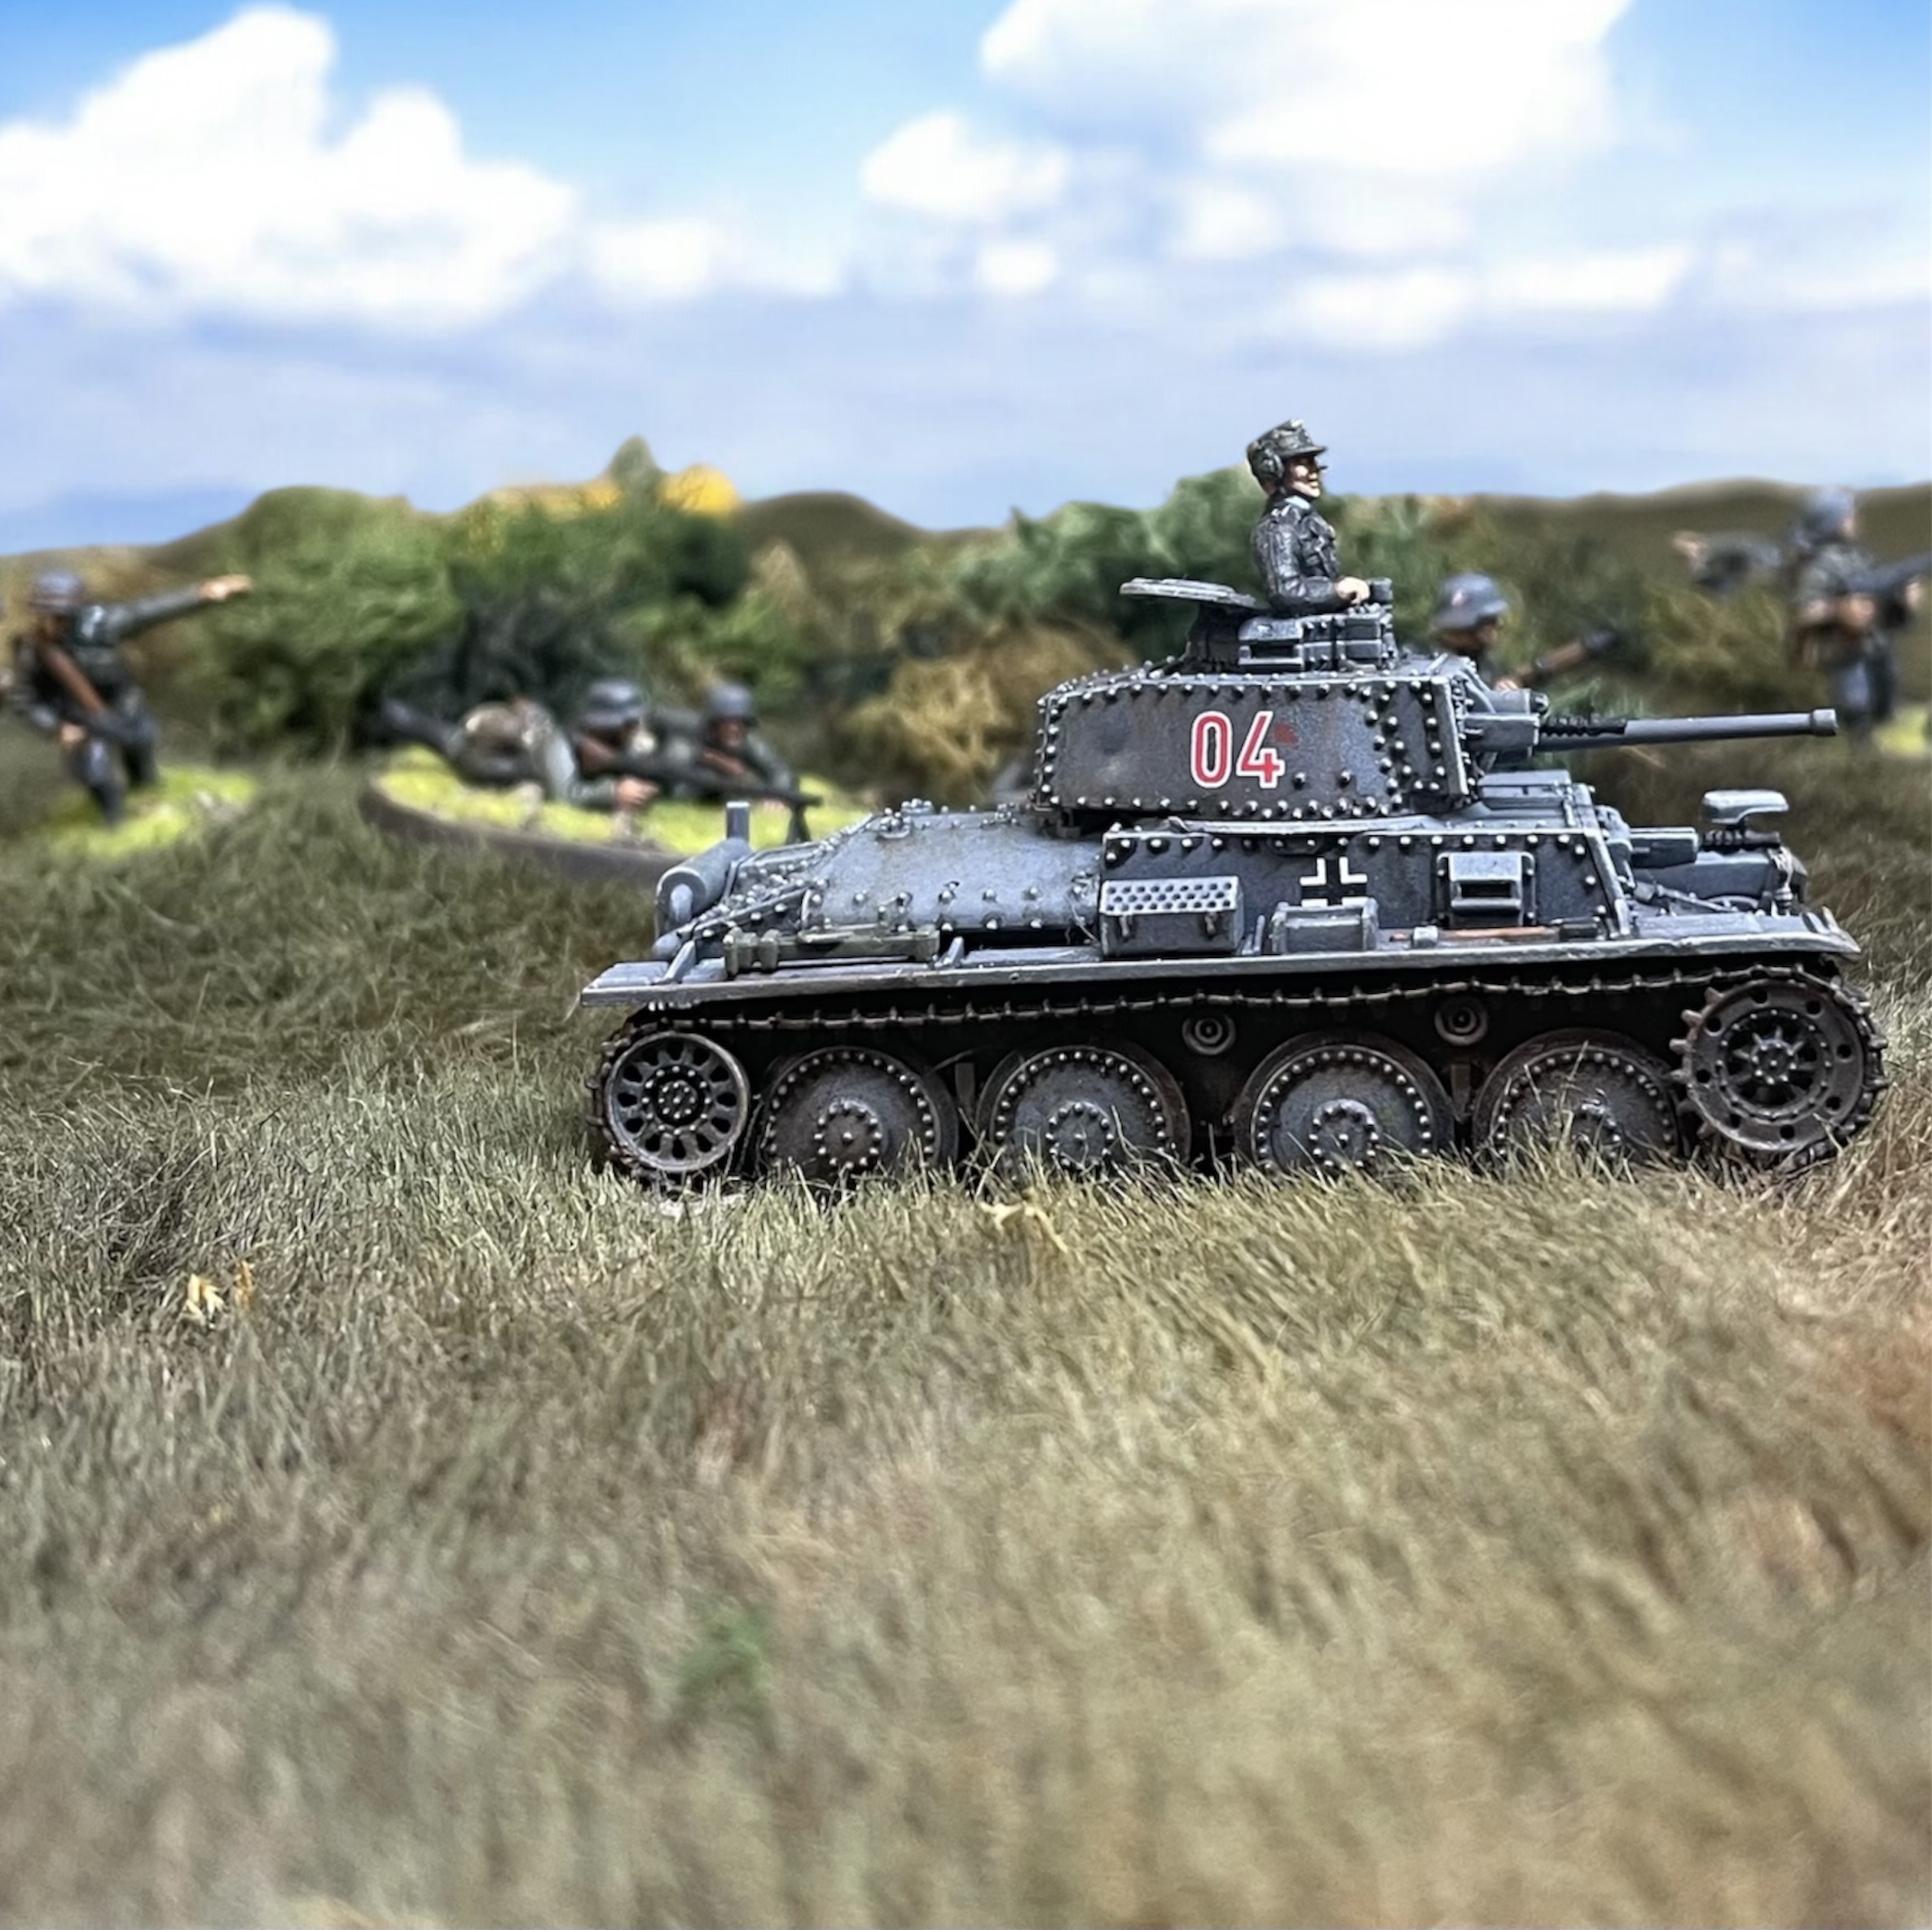
The Soviet flanking maneuver is thwarted by the appearance of a 38t tank that threatens the Russian position. In the woods a hidden Soviet 45mm anti tank gun fires  hitting the tank several times but is unable to crack its armor.  The tank responds and knocks out the anti-tank gun.  The now defenseless infantry are in trouble.  


Their situation worsens when a second 38t speeds towards their position. 


The Soviet’s are soon overwhelmed.  The German tank pair throw shells into the woods and push forward threatening the infantry and a nearby Jump off point.  Where are the Molotovs?  

The glorious German armor dominates 


In the Rail station a Hungarian sniper wreaks havoc on another Soviet platoon until finally spotted after dropping several Russian soldiers.  A Russian light machine gun unloads into the second floor of the station killing the sniper and his spotter.  A Hungarian medium machine team positions itself in the rail station but is driven off with casualties by a newly arriving T-26 tank and an infantry platoon.  The Hungarians respond by bringing up a Nimrod AA Self Propelled gun which unloads on the Russian platoon. 


The outgunned T-26 lurches forward to take cover under a bridge and away from the Nimrod’s guns only to find itself dueling with a Hungarian Anti tank gun-which it drives off- and then a German Infantry Gun.

Peek a boo 


The Soviet reinforcements arrive!  With an Oorah, three more infantry squads from a reinforcing platoon pour into the middle of the Soviet line.  The Germans respond by strengthening their middle along the stone wall that borders the road.  

The mighty Soviet infantry 

Meanwhile the two 38Ts now with supporting infantry have completely chased the Soviets out of the woods and are driving them back and shooting them down.  It’s a trap.  The Czech tanks cross the road and are bearing down when a beast arrives with a bang.  A Soviet KV-2 lumbers forward and fires its big gun at the side of one of the small tanks.  Amazingly the first shot bounces off!  More amazingly the 38T fires back and punches through the KV and wounds the tank Commander!  Not so Amazingly the KV-2 then knocks the 38T out and forces rhe other 38T and infantry to go into hiding. 

The Mighty Soviet Tank 

The less mighty Czech tanks in German service 


Near the rail station the LeIG18 is joined by a Panzer IVD and the rallying Hungarian AT gun.  Poor aim results in several misses from very close range but eventually a hit is scored which kills the gunner of the T26 and drives the tank back into cover. 

Retreat,


The Panzer and friends take the opportunity to fire into Soviet infantry who are attempting to advance under the cover of the bridge. 


The Soviet Infantry is there for a reason. They are joined by a second squad in using the opportunity of a double phase (one of the interesting Chain of Command mechanics) to charge into an unfortunate German rifle squad that is stationed to the right of the house and covering the front against the aforementioned Soviet reinforcements. (note: the lack of Germans in the picture above is due to the photo being taken after the attack).   The Soviets smash the infantry squad and wipe out a flamethrower team hiding amongst the Germans.  The squad is routed and leaves the field. 

The Germans move quickly to halt the breakthrough. The last available reserves of German infantry appear and unload into the Russians.  The Panzer IV and the previously retreating-but now returned- Hungarian medium machine gun join in the attack and cause the Russians to flee.  
The Russians have fled back under the bridge. The machine gun is hidden in the near room of the 
Train station. 

The Hungarians take this opportunity to get aggressive.  An infantry squad charges and routes a Russian  squad driving it back.  The Nimrod, a bit full of hubris crashes through the fence and bushes to try to gun down another Soviet squad. 


The Nimrod-an open topped SPAA gun-forgets it has a giant hole in the top of its armor.  A hidden 45mm anti tank gun appears and fires but misses.  A Russian infantryman tosses a grenade.   Boom!   The grenade lands in the Nimrod and kills the driver.  The Nimrod responds with fire while removing bits of crew from the driver seat.  The AT gun fires again and hits the Nimrod but the shell bounces off.

The Hungarians are about to charge. The 45mm gun is about to fire. 

On the far end of the battle line the Germans are fleeing back into the woods.  The Germans have no answer for the KV-2 which has just knocked out the second 38T by sending a shell through the rear of the fleeing Czech tank. A BT3 has also joined the party. 

                                                                   It was a heck of a shot. 

The fight has turned into a race.  Can the Hungarians on the right side of the German line damage the morale of the Russians before the German left flank crumbles under the weight of an unstoppable  monster?

Oh yeah. There is also a stalemate in the middle with a horde of Russians and line of Germans 

The Hungarians continue to aggressively push the Soviets back.  While taking casualties from small arms fire the Infantry charges into a disordered Russian squad sweeping it off the field and driving the 45mm gun to the rear with casualties and killing the AT Gun leader.  The Soviets respond with withering fire that breaks the Hungarian wave.  The Hungarians unwisely try one final push into a Soviet Maxim team and are repulsed.  

The 45mm AT gun rallies but twice more bounces shells off the  front armor of the Nimrod which would miraculously survive the fight.  
The shock is increasing all around (as represented by red shiny things )

The stalemate in the middle of the field is finally broken when German infantry who were running from the KV storm down the road and slam directly into the center of the Russian front line. A Soviet squad is surprised and thrown back in complete disorder while an adjacent squad is also driven back. The attack is costly and the large number of Russians behind the front line counter attack and wreck what remain of the Germans.  

They’re coming…

A foolish Unterfeldwebel is caught away from his squad and faces down a Soviet armored car and a mortar. The  car misses, the mortar doesn’t .  Luckily for the leader he is only lightly wounded and is able to retreat to safety. 
Ein is the loneliest number. 

The first battle of the operation has ended.  It is a draw.  Neither side breaks but both are close. Morale was dropping with each side down to a force morale of five. 

Conclusiom 

The opening battle of the campaign was a tentative affair dominated by armor.  The lack of infantry anti-tank weapons and the lack of specific objectives stalemated the battle.   The Germans couldn’t take advantage of their early success and the wounding of the KV commander slowed down the already slow tank.  Only the Hungarians made a somewhat successful push, and their attack began to slow when Russian reinforcements arrived to hold the line. 

In the larger picture, the German blitz pushed on.  The Soviets were surrounded and captured en masse and gave ground.  The next test for the Germans would come at a bridge on a river….


Thursday, September 19, 2024

Barbarossa 1941-The Southern Front


It’s early July 1941 inside the western border of Soviet Russia.  Field Marshal Gerd Von Rundstedt and his Southern front has driven Lieutenant General M.P. Kirponos’ Southwest front out of Poland causing devastating casualties on the unprepared Soviet forces.  Operation Barbarossa is succeeding for the German army as planned.  Soon, Russia’s ability to fight will be destroyed and the war in the east will be over. 

In this Chain of Command series of five battles the forces of the German army will attempt to drive deep into the oil rich heartland of the southern Soviet Union.  The German army supported by obscure Hungarian forces (that some historians would even say were never involved in fighting) will face a determined Russian army.  

Battles will involve two to three platoons per side and represent only a tiny snapshot of a larger battle.  

Each player will be given an allocation of points to select support options with the exception of tanks and anti- tank guns.  These will be (possibly frustratingly) drawn randomly from a pool of available equipment.  This pool is finite and destroyed tanks are lost for the campaign.  

Additionally fights will not always be fair.  In true Irregular(s) fashion players may not always be available.  Their lack of appropriate priorities ( kids? jobs? Hogwash) may result in part of an army not being available.  Alas, that’s war.  

Saturday, May 4, 2024

Spring Formal Dungeonbowl Game Reults

 Randomly Chaotic won the First Annual Spring Formal Dungeonbowl (game.)

Congratulations to the newcomers   


Full Results 

Randomly Chaotic (Chaos Chosen). Four touchdowns 

Asaheim Alcoholics (Norse).  Two touchdowns 

Blood Mountain Brawlers (Orks) Two touchdowns 


Of Note: The defending Irregular bowl champion Witch Gate Wanderers were

Invited to the game but failed to appear.   If you see them tell them we’re worried.


Friday, December 29, 2023

The Battle of Shaunsburg Part 4

 Dusk approached the battlefield near the little town of Shaunsville.  Less than two hours remained for the Confederate forces to score the breakthrough that could cut off the Union retreat and bag the entire Federal army.  The Army of the Potomac was holding on but barely. 

The battle rages on looking across from the Confederate left. 

The Union generals didn’t know it but the three objectives that were the target of the Confederate attack were on Birney’s hill in the center right of the Union line, on Artillery hill in the Union center left and along the fenced road on the Union left.  The Confederates had selected the objective on the far Union left but the objective was moved unknowingly during set up when the Union generals swapped it for the objective that had been on artillery hill as part of the rules of set up that allowed them to  switch two objectives of their choice  


7:20pm-9:00pm (Dusk)

The Union army held on for darkness.  On the Union far right the division of Hays continued to hold a strong position along a wall on the edge of a large wheat field.  After initially bristling at a Confederate brigade positioned across the wheat field, Hays pulled his division back and sent one of his brigades through the woods to his left and in the rear of Birney’s division near the center of the field.  Hays also pushed an artillery battery into a gap through some woods on the left of his front line, turned it and blasted advancing Confederates in flank as they tried to push up the hill in Birney’s sector.  

The aforementioned division of Birney finally had a second brigade  arrive and march out of the woods at the crest of the hill in the center right of the Union line.  Hobart Ward’s brigade of Birney’s division was in shambles and Ward was wounded. One regiment was run down when it attempted to flee through the cornfield.  Another regiment routed off the field and two others were battered.   Ward had paid a hefty price but his brigade had slowed the attack of  three Confederate brigades buying time for his two other late arriving brigades to march into position. The first of those brigades raced forward to a stone wall that stood at the foot of what was now being called Birney’s hill facing a farmstead situated between the wheat field  and corn field. 
The Confederates advance towards Birney’s hill 


The left flank of the Union line was the most threatened and had been under heavy pressure all day.  Artillery hill-now named for the three Union batteries anchoring the center left of the Union line had pounded the oncoming Confederates since the battle started.  Union cavalry had arrived in time to dismount and form a line at the base of the wooded face of the hill.  The Illinois and Indiana horsemen supported the guns but had taken a pounding and were being pressed heavily. 

The Confederates push against the Union cavalry and Artillery hill


On the Union far left the Iron Brigade held on. Three Confederate brigades with supporting artillery had failed to break them.  Now reinforcements from the two other brigades of Abner Doubleday’s division marched onto the field to support them.  One positioned itself along the road to the left of the Union cavalry and the other marched up the rear of Artillery hill. 

This was the Union situation with two hours remaining.

The Confederate plan was struggling to survive contact.  On the Confederate left in the wheat field the feint had been effective.  Kemper’s brigade held three Union brigades of Alexander Hays’s division in place even as six other Confederate brigades pounded two Union brigades elsewhere on the field. Now with one of those Union brigades moving off to shore up the Union middle Kemper started to advance. 

In the middle the Confederates had been held up by Ward’s stubborn brigade but had finally pushed it back and were advancing against Birney’s hill. Union reinforcements had all but ended any hope of taking the objective at the crest of Birney’s hill but it was paramount that the Confederates opposite the hill prevent Birney from sending help over to Artillery hill.

Artillery hill and the objective on that hill would be the primary target in the Confederate center. Three artillery batteries with no infantry support were all that held the top of the hill.  The arrival of a Confederate artillery battalion consisting of 24 guns in a field in the center of the Confederate line would bolster the attack on Artillery hill. 

The massed guns in the Confederate center would prove decisive


On the Confederate right Barksdale’s Mississippians had been wrecked in the attempt to push through.  Now it was to be the turn of McClaws’s other two brigades.  The Iron Brigade had received reinforcements.  The simple Confederate strategy was to push through them.  No finesse.   If the third objective was to be taken, it would likely have to be by the bayonet.  

This was the Confederate situation with less than two hours left. 

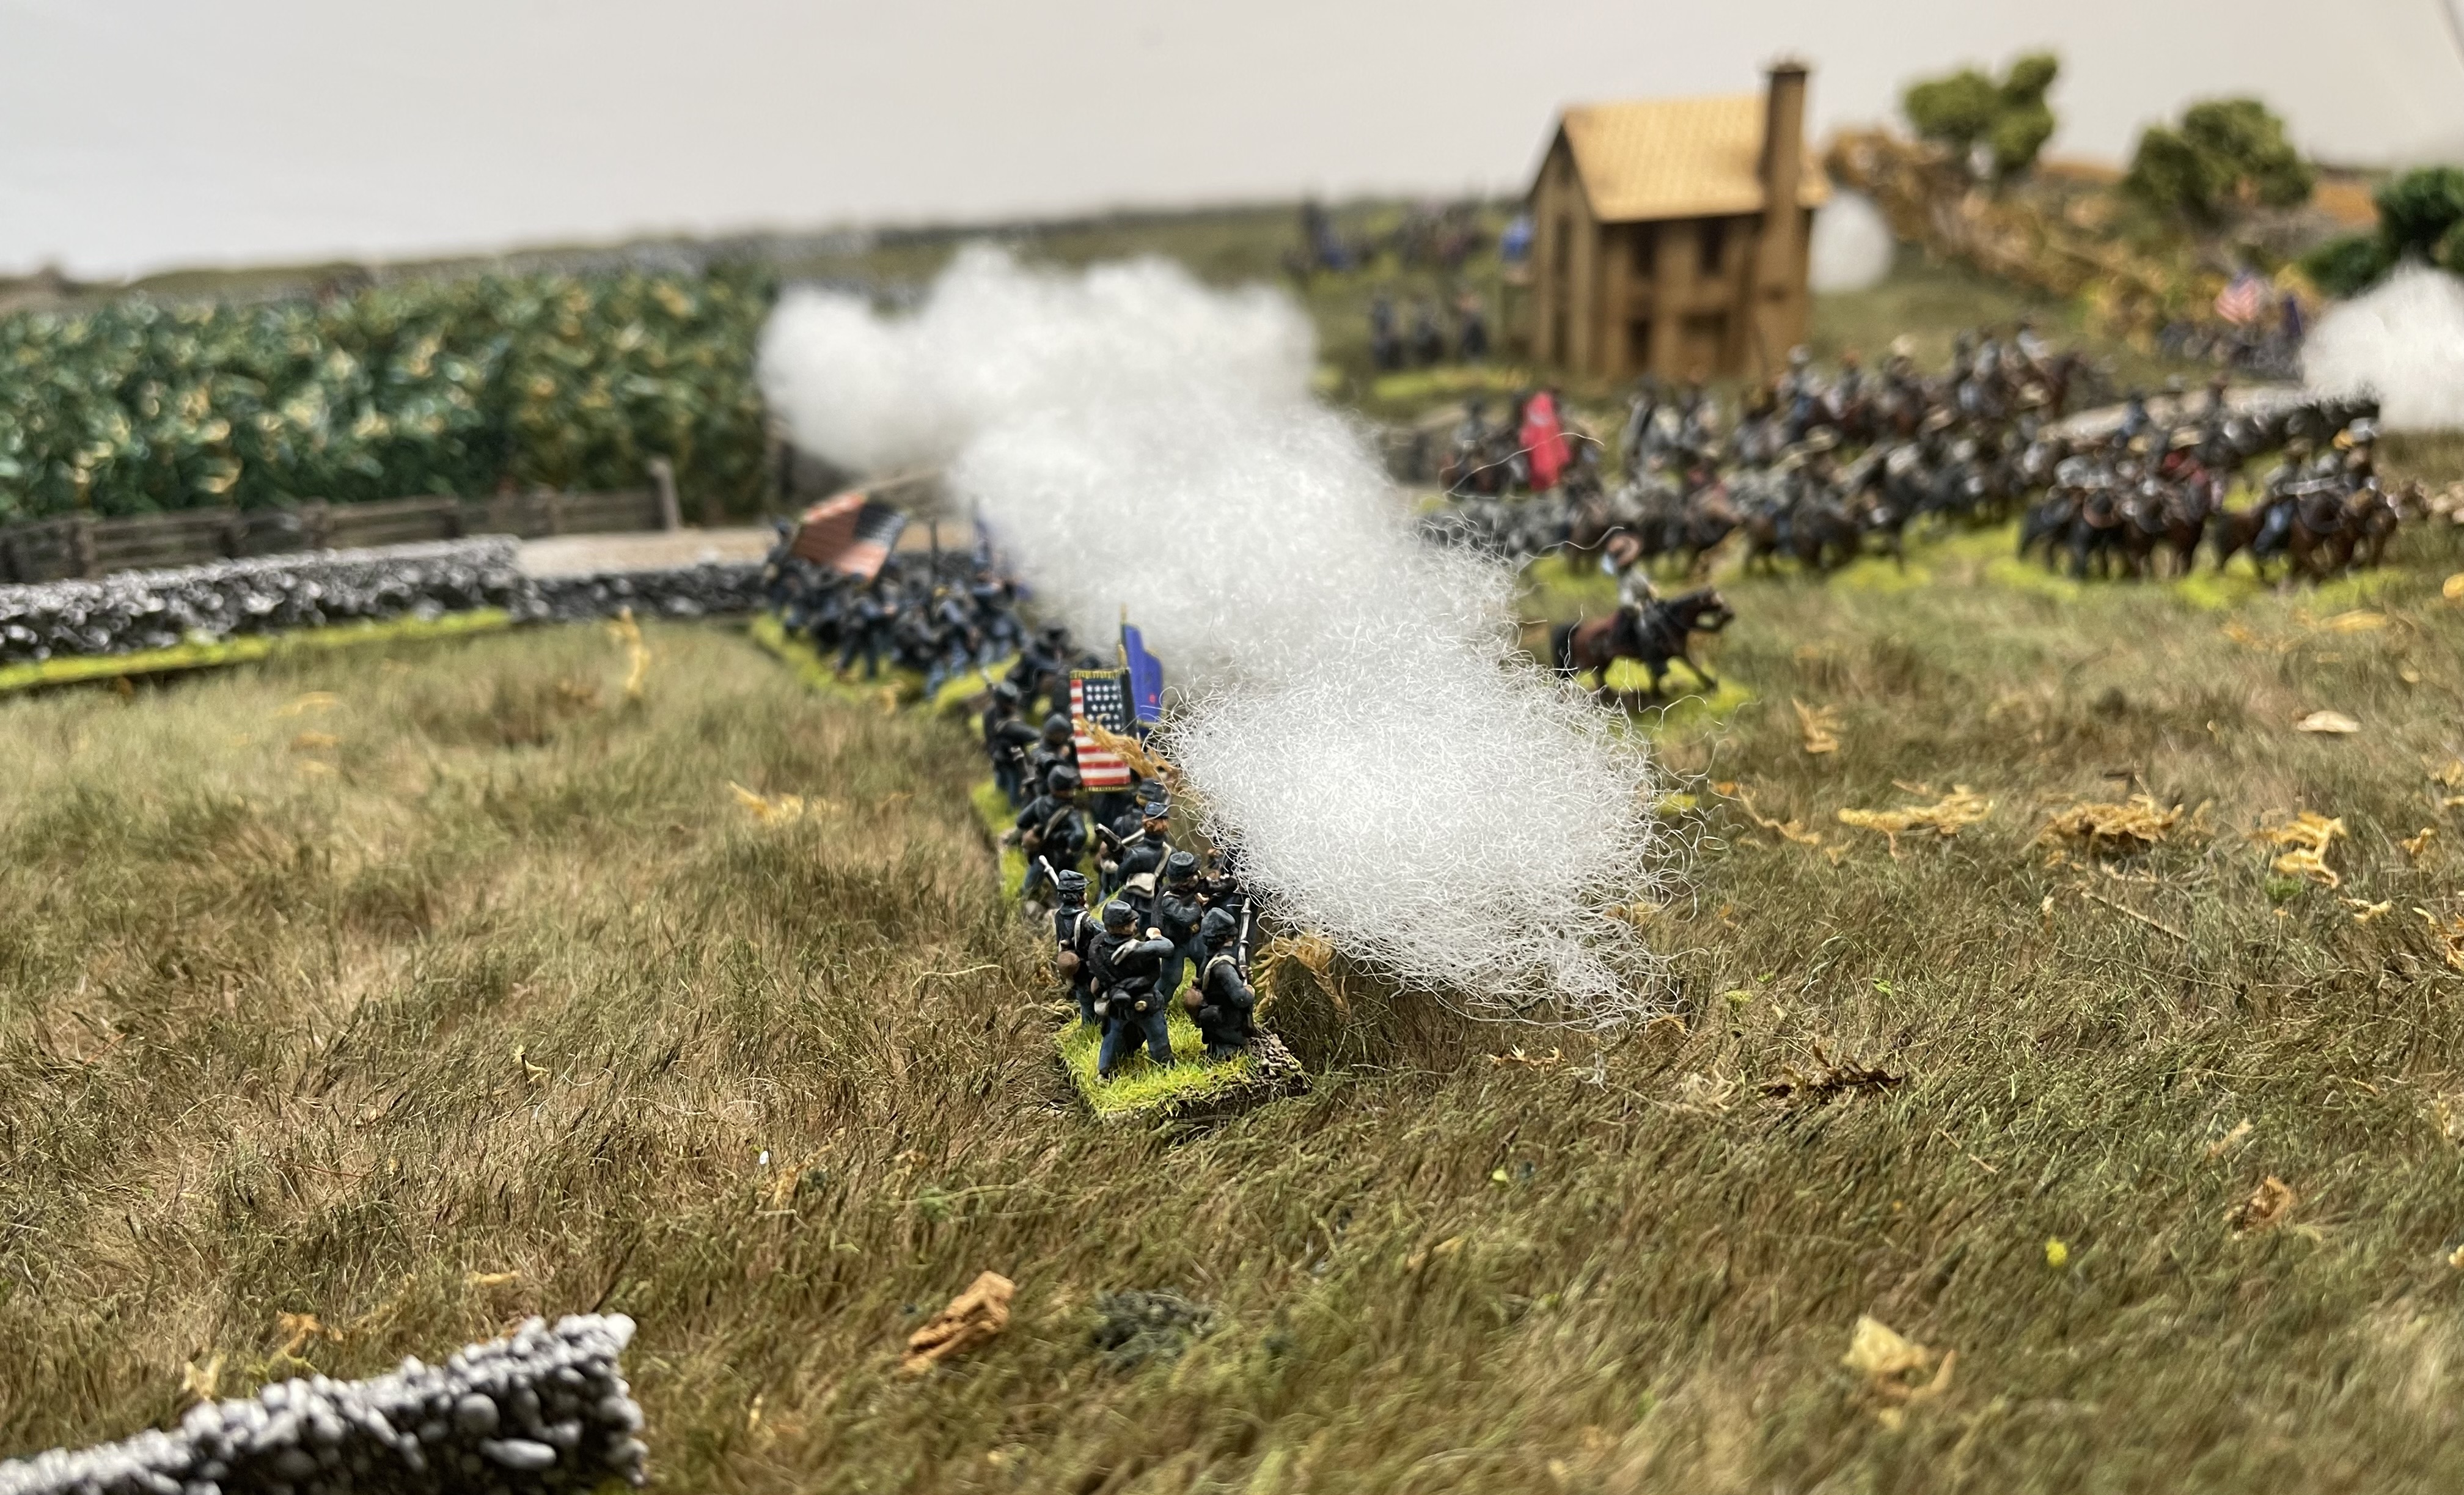
On the Union right the wheat field remained firmly in hand.  The Union sortie resulted in sporadic but largely ineffective firing.  It appeared with dusk approaching that the two sides would continue to pop shots off with no real effect but then suddenly James Kemper slipped the leash and turned a feint into a full charge.  Leading his men Kemper charged forward in an assault three regiments strong. The men crossed the first wheat field and slammed into an Ohio regiment who fired ineffectually and fell back.  The Confederates pounced on the Buckeye staters and captured them complete in the ensuing melee.  

Victory brought confusion to the Rebs.   Two Union regiments posted behind the split rail fence in the road loosed volleys striking down greybacks in droves.  This resulted in the beginnings of a panic.   Kemper was then shot down causing the brigade to route entirely.   A charge by another Union regiment against the remaining regiment of Kemper’s brigade ended in a repulse for the Yankees.  That ended the action on the Union right. 

The Louisianans facing Birney’s hill tried to dislodge the Union defenders from the stone wall at the base of the hill.  They were bloodily repulsed with the First  Louisiana taking 50% casualties.  The rest of the brigade reformed while supporting artillery pounded the wall.A second charge carried the wall but darkness ended any hope in this part of the field.  The first of the three objectives would not be taken by the Confederates.
An explosive sheet of flame erupts from the stone wall into the Louisianans 


Over on Artillery hill a race was being run.  Union reinforcements from Doubleday’s final deployed brigade was racing up the back side of the hill at the same time as Confederates pushed up the front. Withering fire from the Confederate battery of 24 guns deployed in the Confederate center knocked down Union cannoneers on the hill in droves. The fire was so accurate that not a horse was hit but one entire battery crew  was knocked out and the two others were reduced to a skeleton crew. 

Georgians and Virginians of Semmes’s brigade emerged from the woods at the top of the hill into a face full of double canister from the two remaining guns. One regiment routed but the unsupported guns were overrun. 

The hill is stormed. 

The freshly arrived Union brigade from the rear of Artillery hill sounded the charge and crashed into the Confederates who reformed from their disorganized state after taking the cannon. The Union wave overwhelmed the Confederates and after a decisive melee the Georgians and Virginians were driven off the hill.  

It was too little too late. Two more Confederate brigades swarmed the hill taking the second objective. 

On the far Union left the Iron Brigade’s desperate defense was coming to an end.  They had held off multiple attacks by multiple brigades for six hours.  Could they last one more?

In front of the cornfield on the extreme left flank, the last of McClaws’s brigades charged the far left regiment of the Iron brigade. A desperate volley halted the first Confederate regiment but the second smashed into the western farmhoys  causing them to route from the field.  Now in the cornfield, the Confederates reformed facing the flank of the entire Union line.  A regiment of one of Doubleday’s other brigades tried to blunt their attack but were driven back and captured in the ensuing melee. The Union left was crumbling. 

The final charge 

The last bastion of Union defense fired volley after volley into the approaching Confederates causing heavy casualties.  The 24 gun battalion of rebel artillery that had earlier caused so much damage now turned its guns on the Union left.  The bombardment lasted forty minutes.   The last remaining Yankee cavalry battalion sustained 50% casualties and routed. This was too much for the infantrymen to their left and they too routed.

The third objective was taken by the Confederates.

The Results

The Confederates had scored an incomplete victory.  By taking two of the three objectives they would cut off at least part of the Union army from escaping across the river.  The Iron Brigade lived up to their name and slowed the Confederate attack.  Ward’s brigade held off an even bigger attack with less help and saved Birney’s hill from being overrun.  Meanwhile, three Union brigades were feinted into immobility on the Union right when they could have seen better use on their left. 

The Confederates sustained approximately 7205 casualties of their more than 23000 engaged.  Two generals, Kemper and Walker were killed.   Semmes’s brigade of McClaws’s division sustained the highest number of Confederate casualties at 1050 of 1920 engaged (a 54% casualty rate) in taking Artillery hill.  On the positive side the Rebs captured 22 Union cannon and lost none.  

The Union sustained approximately 5870 casualties of the more than  22000 engaged.  Ward’s Brigade of Birney’s division sustained the highest number of casualties in the battle at 1140 of 2400. A 46% casualty rate.  In doing so they saved Birney’s hill and likely total defeat. 

Total casualties thus were approximately 13075 killed, wounded and captured out of approximately 46000 engaged.  

The war would go on…


Monday, December 18, 2023

The Battle of Shaunsburg Part 3

 In an attempt to capture three objectives and cut off the defending Union army’s retreat the Confederate attack ramped up in the next phase of the battle. The initial right flank attack gained strength and the Union hold on that part of the field was in for a challenge. 

Union troops hold the fence and the left flank of the defensive line. 


6:00pm-7:20pm

On the Union right flank Hays’ division was present in full on the field behind a fence in a wheat field.  They bristled menacingly and even advanced beyond the defensive line but participated little.  While the Union middle and left suffered under Confederate hammer blows the troops of the right sat firm holding off a single less than aggression Confederate brigade.  In nearly three and a half hours of fighting Hays’ division suffered only 540 casualties with 480 of these being from a single regiment caught marching to the center by a cavalry charge that hit them in column and swooped them up. 

In the Union center the situation was more grim. A single Union brigade held a stretch of nearly a mile of ground.  Parts of two Confederate divisions under John Bell Hood and D R Jones attacked and drove the brigade up the hill the Union troops were trying to protect.  This was the brigade of Hobart Ward of Birney’s division and it was near breaking.  The two other brigades of the division missed their six o’clock arrival time and were not in sight.  

An aggressive and steady push by two of D R Jones's brigades and a battery of horse artillery from Wade Hampton’s cavalry brigade was slowed but not stopped.  A brave sally forth by a lone Union regiment into the central cornfield was crushed by a Confederate charge but may have slowed the Rebel advance just enough as Carr’s Brigade finally arrived a full hour late. 

Carr arrives late but maybe not too late. 

On the Union left where the main Confederate blow had landed the Iron Brigade continued to stubbornly hold back parts of two Confederate Brigades under Barksdale and the Texas Brigade.   The timely arrival of Farnsworth’s cavalry and its repeating carbines as well as three artillery batteries lending support from atop a centrally located hill drove off the charge of the Texas brigade.    Barksdale was able to gain the far flank and hit the Union line in full enfilade with a charge that routed an Illinois cavalry battalion and rolled up the Union left flank. 

The Texas Brigade is held back 

Just as in the middle, the hard fighting Wisconsin and Indiana boys with support from the Cavalry received hammer blows but bought time.  Doubleday’s two other brigades arrived to try to support the crumbling flank.  

The Confederates too welcomed reinforcements.  Hood’s supporting artillery arrived and began pouring fire into a battalion of cavalry that was anchoring the right end of Doubleday’s left flank.   A point blank volley by a regiment in Evander Laws’ brigade sent another cavalry battalion running into the woods and up the hill in the Union center left.  If the Confederates gained that hill the Union center might collapse.  

Would the Union reinforcements win the race to drive off the Rebel attack?

Union troops march in behind the Union center 


In three hours of fighting 22420 Union soldiers suffered approximately 2670 casualties.  23580 Confederates suffered 3810 casualties.  Ward’s Union brigade in the center alone sustained 1140 casualties  while the entire division of Hays only suffered 540. Two Union brigades of roughly ten regiments supported by three battalions of artillery had held off parts of three Confederate divisions containing 30 regiments while three fresh Union brigades held off one Confederate brigade.  

Only a little over two hours of daylight remained.  Could the Union hold?


Wednesday, December 6, 2023

The Battle of Shaunsburg Part 2

 The battle of Shaunsburg began to develop with an aggressive right hook by the attacking Confederate army. Reinforcements were slow to arrive but the Brigades on the field began to come into range of each other.

Union batteries holding a hill in the Union center unleash on the approaching Confederates.

5:20pm-6:00pm

Barksdale’s Mississippi Brigade continued to advance with artillery support against three regiments of the Iron Brigade who marched out to meet them. The Black Hats charged the cannon that had been blasting them but were instead intercepted by four of Barksdale’s regiments led by Barksdale himself.  The Confederates crashed into the Western Brigade and knocked it back in disorder, routing one regiment and throwing two others into disorder. The Rebels were disordered as much by success as the Yankees were by defeat.  

Directly to the left of the charge the Texas Brigade tangled with two other regiments of the Iron Brigade and were ready to get stuck in when Union cavalry stampeded up the road behind the Union line, dismounted and fired repeaters to great effect. The charge of the Texas Brigade was broken up in confusion. The horse artillery and another cavalry regiment blasted the Mississippians who attempted to reform to face them.   

Shaken but not routed, the Iron Brigade fires into the Mississippians 


In the Confederate center left Hampton’s cavalry caught the Second New Hampshire marching in column along a road in front of them. They charged.  In the resulting melee the New Hampshire regiment is killed or captured to a man as sabres and pistols make short work of them.  The cavalry in turn sustained heavy losses from fire from both left and right as several Union regiments and a battery of guns moved to seal the breach.  One Cavalry Battalion fled and Hampton is wounded in the attack.   

A Union volley empties Confederate saddles. 

Meanwhile on the Union far right Hancock’s entire Corp is on the field in strength  

Look at that strength 

In two hours of fighting 22410 Union soldiers (half on the field) suffered approximately 780 casualties. In that same time 23580 Confederate soldiers (half on the field) suffered 1360 casualties.  The Union left and center are pressured but have not broken.  The battle continues.
Looking across from the Union right and Confederate left 


Chapter One:The Patrol

“  The Incident on Saint Isadore Caenum began at the port in Hennelsburg  with a plan to infiltrate Warmaster Hollenlarm’s advanced agents o...